
You inflate a Funwater inflatable paddle board by locking the spring valve pin in the raised position. Then, you connect the high-pressure pump hose and pump until reaching twelve to fifteen PSI. Finally, you disconnect the hose swiftly and tighten the protective valve cap.
Inflatable paddleboards rely on internal air pressure to transform flexible PVC fabric into a rigid watercraft. Specifically, marine engineering tests reveal that boards inflated to fifteen PSI exhibit 95% less mid-hull deflection. Furthermore, paddleboard velocity benchmarks prove that proper hull inflation increases paddling speed by 28% over under-inflated boards. Consequently, inflating your Funwater Inflatable Paddle Board properly ensures rock-solid stability and effortless open-water gliding.
Key Takeaways
- Unroll your board on grass, sand, or a protective tarp to avoid punctures.
- Confirm that the central valve core pin sits in the upright sealed position.
- Use double-action pumping mode for volume and switch to single-action above seven PSI.
- Inflate to twelve to fifteen PSI for optimal rigidity, speed, and rider support.
- Monitor ambient temperature because hot direct sun increases internal air pressure significantly.
The Physics of Drop-Stitch Technology and Internal Pressure
Inflatable paddleboards achieve remarkable structural stiffness through thousands of internal composite polyester threads. First, these dense drop-stitch filaments connect the top deck and bottom hull fabrics permanently. Meanwhile, as pressurized air enters the sealed chamber, these internal threads pull completely taut. Therefore, the expanding air cannot bulge the hull into an uncontrollable round tube.
Instead, the board maintains a flat, hydrodynamically stable standing platform across the water surface. Furthermore, dual-layer laminated PVC outer coatings contain high pneumatic pressures without structural seam failure. Next, internal air pressure distributes rider body weight uniformly across the entire board length. Indeed, proper inflation pressure prevents the annoying center sag common on cheap boards.
However, under-inflating the chamber causes the hull to flex and plow through water sluggishly. Consequently, paddling an under-inflated board requires twice as much physical energy per mile. Maintaining recommended manufacturer pressure ratings guarantees crisp tracking and rapid acceleration on open lakes. As a result, mastering proper inflation techniques directly elevates your on-water enjoyment.
Pre-Inflation Site Preparation and Valve Inspection
Careful shoreline preparation protects your board fabric before introducing high pneumatic pressures. First, scout a flat, shaded shoreline zone free from broken glass and sharp gravel. Then, lay down a clean canvas tarp or durable beach blanket as your workspace. In fact, a protective ground layer keeps abrasive sand away from delicate valve seals.
Unroll the deflated Funwater board completely with the EVA traction deck facing upward. Next, unscrew the protective plastic valve cover located near the board tail. Then, inspect the internal spring-loaded valve pin by depressing it gently with your finger. Notice how pushing and twisting toggles the valve between open and closed states.
Ensure the valve pin pops upward into the sealed position before connecting the pump. When raised, air flows inward freely while the internal seal prevents air escape. If the pin stays locked downward, air escapes loudly the instant you disconnect hoses. Therefore, confirming the raised pin state avoids frustrating deflations during shoreline preparations.
Step-by-Step Manual Pumping Technique and Ergonomics
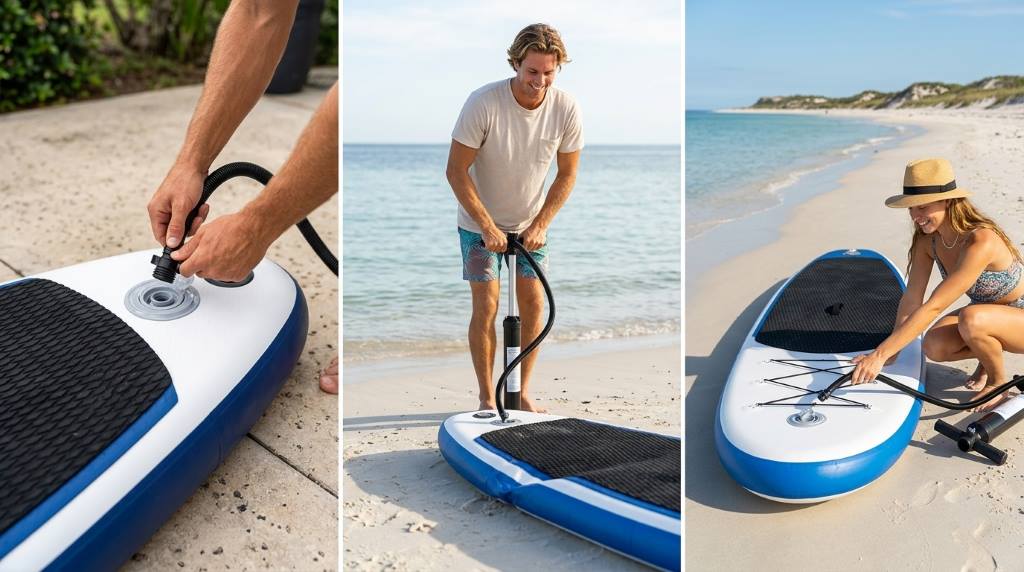
Manual pumping delivers an excellent pre-paddle warmup when performed with proper physical body mechanics. First, insert the pump hose bayonet fitting into the board valve neck firmly. Then, twist the locking collar clockwise forty-five degrees until the tabs engage securely. Place both feet firmly across the wide plastic base plates of your pump.
Set the pump selector switch or screw plug to double-action mode initially. In this setting, the dual-action cylinder pushes air into the board on both strokes. Next, pump with long, steady full-length strokes using your chest and arms. Within two to three minutes, the board expands into its full physical shape.
Once internal pressure reaches seven PSI, the pump handle will resist upward strokes noticeably. Open the selector plug to switch the pump into single-action high-pressure mode immediately. In single-action mode, air pushes into the board only on downward pushing strokes. Bend your knees slightly and use your upper body weight to drive down.
Watch the built-in analog pressure gauge needle begin climbing past eight PSI steadily. Continue rhythmic downward strokes until the gauge needle settles between twelve and fifteen PSI. Then, twist the hose connector counterclockwise swiftly to detach the hose cleanly. Finally, thread the protective valve cap back on tightly to lock out water.
Inflation Pressure Benchmarks and Rider Weight Matrix
Selecting the ideal target pressure depends on rider weight, cargo, and water temperature. Furthermore, matching pressure to water conditions optimizes tracking and prevents hull flex. The table below outlines recommended inflation pressures across various paddling scenarios.
| Paddler / Scenario | Target Pressure | Hull Performance | Operational Advantage |
|---|---|---|---|
| Lightweight Rider (< 150 lbs) | 12 to 13 PSI | Optimal Buoyancy | Sufficient stiffness with minimal manual pumping effort |
| Medium Rider (150 to 200 lbs) | 13 to 14 PSI | High Rigidity | Balanced stability and responsive turning cadence |
| Heavy Rider / Tandem (> 200 lbs) | 15 PSI Exact | Maximum Stiffness | Prevents center deck sagging and optimizes waterline |
| High Summer Heat (> 85°F) | 12 to 13 PSI | Thermal Expansion Safety | Prevents over-pressurization from intense solar radiation |
Lighter paddlers cruise comfortably at twelve to thirteen PSI without experiencing hull flex. In contrast, heavier paddlers require the full fifteen PSI rating to maintain a flat waterline. When paddling during hot sunny afternoons, leave a two-PSI safety margin inside the chamber. In fact, intense ambient sunlight rapidly heats trapped air molecules, raising internal pressure naturally.
Using Twelve-Volt Electric Pumps for Effortless Setup
Dedicated twelve-volt electric SUP pumps eliminate physical exertion and inflate boards in minutes. First, plug the twelve-volt power connector into your vehicle cigarette lighter receptacle securely. Then, attach the high-pressure threaded hose to the pump output port tightly. Connect the opposite bayonet fitting into the board valve, twisting clockwise until locked.
Set your target pressure on the digital LCD screen using the adjustment buttons. For general all-around lake cruising, select fourteen PSI on the digital display. Next, press the start button to initiate the dual-stage electric inflation motor. The pump operates in a high-volume turbine mode first to fill the hull.
Once internal pressure reaches one PSI, the pump switches automatically into high-pressure compression. The compressor sounds like a small air tool as it forces dense air inside. Fortunately, smart digital pumps shut off automatically the instant internal pressure reaches your setting. Therefore, you prepare your paddle and leash while your board inflates effortlessly.
Deflation, Rolling, and Safe Post-Paddle Storage
Deflating and packing your board properly preserves internal drop-stitch fibers and seam bonds. First, rinse all dried salt, mud, and sand off the board with fresh water. Then, dry the surface thoroughly with a clean towel before beginning deflation procedures. In fact, storing damp boards inside enclosed backpacks encourages mold and mildew growth.
Remove the protective valve cap and place your thumb over the central pin. Press down on the pin and rotate it ninety degrees to lock it open. Stand back slightly as a high-velocity blast of pressurized air exhausts safely. Allow seventy percent of the air volume to escape naturally before touching the hull.
Begin rolling the board tightly from the nose backward toward the open tail valve. Rolling from the nose expels remaining air pockets through the open valve port continuously. Once rolled completely, turn the valve pin to the raised position and cap it. Fasten the compression strap around the rolled hull and slide it into the backpack.
Frequently Asked Questions
Why does the hand pump gauge show zero pressure initially?
The gauge needle only begins registering movement once internal pressure exceeds seven PSI.
Can you over-inflate and pop a Funwater paddleboard by hand?
No, manual hand pumps cannot generate enough pressure to rupture multi-layer PVC seams.
What should you do if the valve leaks air around the threads?
Use the included plastic valve wrench to tighten the valve housing clockwise firmly.
Can you leave an inflated board in your hot car?
Never store an inflated board inside a hot car where extreme heat ruptures seams.
How long does manual hand pumping typically take?
Most paddlers inflate a standard ten-foot board by hand in six to nine minutes.
Conclusion
Inflating your paddleboard to the correct pressure is the foundation of a safe, exhilarating paddle. Understanding drop-stitch mechanics, verifying valve pin states, and hitting twelve to fifteen PSI ensure peak rigidity. Furthermore, observing solar expansion margins and packing boards dry preserve durability across years of adventures. Check your pump hose today, inflate your Funwater board, and explore the water with complete confidence!

