
Surfboard wall mounts are a stylish and practical way to store your boards while keeping them safe and accessible. Over 3 million Americans surf regularly, and many struggle with proper board storage. A well-installed surfboard wall mount not only saves space but also protects your surfboard from dings and warping. Whether you prefer a vertical or horizontal setup, the right approach ensures your board stays secure and ready for your next session.
Why Wall Mounts Are a Game Changer for Surfers
A surfboard wall mount keeps your gear organized and within reach. Many surfers leave their boards leaning against walls or in garages, which can lead to damage over time. Wall mounts prevent accidental falls and reduce clutter in your home or garage. They also turn your surfboard into a piece of art, adding a coastal vibe to any room.
For those in humid climates, proper storage is even more critical. Moisture can warp boards and weaken fins if they are not stored correctly. Wall mounts lift boards off the floor, reducing exposure to dampness and extending their lifespan. This is especially important in areas like Florida or California, where humidity levels can rise above 70 percent.
Choosing the Right Wall Mount for Your Surfboard
Not all wall mounts are created equal. The best option depends on your board type, wall material, and available space. For shortboards, a simple horizontal rack often works well. Longboards, however, may need vertical mounts to save space and prevent sagging.
Look for mounts made from strong materials like stainless steel or aluminum. These resist rust and corrosion, which is vital in coastal areas. Avoid plastic mounts, as they can crack under the weight of a surfboard. Also, check the weight capacity of the mount to ensure it can handle your board’s size.
Tools and Materials You Will Need
Gather the right tools before you start to make the process smooth. You will need a stud finder, drill, level, measuring tape, and screws. For most walls, 2-inch screws are sufficient, but thicker walls may need longer ones.
If you are mounting into drywall, use anchors to add extra support. For brick or concrete walls, a masonry bit and anchors designed for these materials are a must. A pencil and painter’s tape will help mark your drill points accurately.
Step by Step Guide to Installing a Vertical Surfboard Wall Mount
Locate the Studs in Your Wall
Use a stud finder to locate the studs behind your drywall. Studs provide the strongest support for your mount. Mark the stud locations with a pencil so you can see them clearly.
If you cannot find studs where you want to mount, use heavy-duty drywall anchors. These spread the weight across a larger area and prevent the mount from pulling out of the wall. Always check the weight limit of the anchors before use.
Measure and Mark the Mounting Points
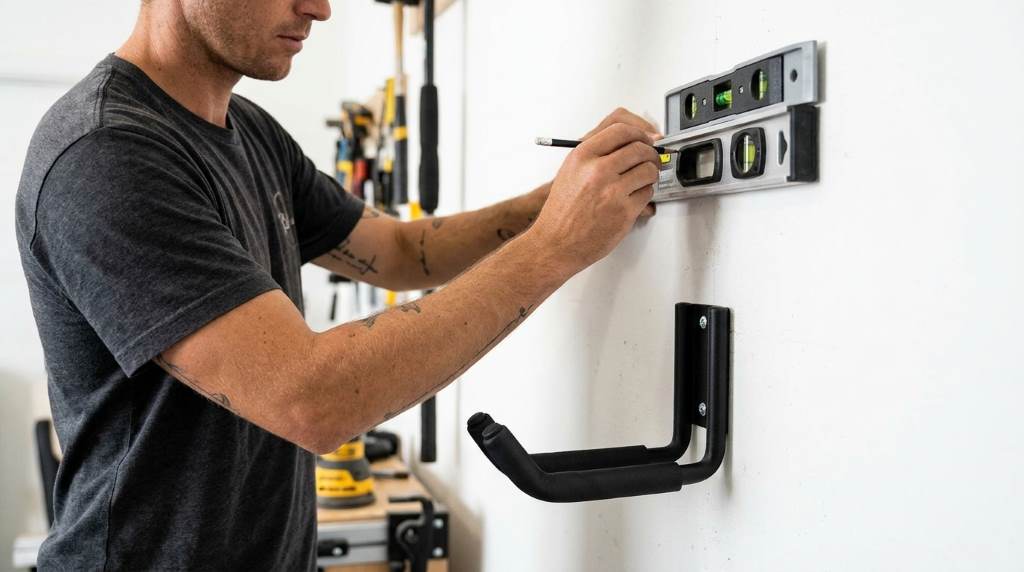
Hold the mount against the wall at your desired height. Use a level to ensure it is straight. Mark the screw holes with a pencil, then double-check the alignment before drilling.
For vertical mounts, place the top bracket slightly higher than the board’s nose. This prevents the board from sliding down. If mounting multiple boards, space the mounts at least 18 inches apart to avoid interference.
Drill Pilot Holes and Attach the Mount
Drill pilot holes at your marked points to make screwing easier. Insert the screws through the mount and into the wall, tightening them securely. If using anchors, insert them into the pilot holes first, then attach the mount.
Test the mount by gently pulling on it to ensure it is firmly attached. If it feels loose, add more screws or anchors for extra stability.
Secure Your Surfboard
Lift your surfboard and place the nose into the top bracket of the vertical mount. Gently lower the tail until it rests in the bottom bracket. Ensure the board is centered and balanced to prevent it from tipping.
For added security, use a bungee cord or strap to hold the board in place. This is especially useful in high-traffic areas where the board might get bumped.
Step by Step Guide to Installing a Horizontal Surfboard Wall Mount
Determine the Best Height for Your Mount
Horizontal mounts work well above furniture or along empty walls. Measure the height of your board and mark a point on the wall that is at least 6 inches above the tallest part of the board. This allows for easy removal and replacement.
If mounting multiple boards, stagger the heights to create a visually appealing display. Leave enough space between each mount to prevent the boards from touching.
Install the Mounting Brackets
Hold the first bracket against the wall at your marked height. Use a level to ensure it is straight, then mark the screw holes. Repeat for the second bracket, ensuring both are aligned horizontally.
Drill pilot holes and attach the brackets with screws. For horizontal mounts, the brackets should be spaced wide enough to support the board’s width. Most mounts come with spacing guidelines, but a good rule is to place them at least 24 inches apart.
Place Your Surfboard on the Mount
Lift the surfboard and rest it on the brackets. Ensure the board is centered and balanced. If the mount has a lip or groove, make sure the board sits securely within it.
For extra stability, use foam padding on the brackets to prevent scratches and provide a softer grip. This is particularly important for boards with delicate finishes.
Unique Tips for High Humidity Areas
In coastal regions, humidity can cause issues for both your surfboard and the mount. To combat this, choose mounts made from corrosion-resistant materials like stainless steel or powder-coated aluminum. These materials resist rust and last longer in damp conditions.
Apply a thin layer of silicone lubricant to the screws before inserting them. This creates a barrier against moisture and makes future adjustments easier. Additionally, consider using a dehumidifier in your storage area to reduce moisture levels.
Common Mistakes to Avoid
One of the biggest mistakes is skipping the stud finder. Mounting into drywall without studs or anchors can lead to a dangerous fall. Always ensure your mount is attached to a solid structure.
Another common error is using the wrong screws. Short screws may not reach the studs, while overly long screws can damage the wall. Match the screw length to your wall type for the best results.
Avoid placing mounts in direct sunlight or near heat sources. Over time, exposure to UV rays can fade your surfboard and weaken the mount’s materials. Choose a shaded, temperature-controlled area for the best longevity.
Creative Display Ideas for Your Surfboard
Turn your surfboard into a focal point by arranging multiple boards in a pattern. For example, mount two boards vertically on either side of a horizontal board to create a balanced look. This works especially well in living rooms or entryways.
Add LED strip lights around the mount to highlight your board. This not only enhances the display but also provides subtle lighting for the room. Choose warm white lights for a cozy feel or colorful lights for a fun, modern look.
Incorporate other beach-themed decor around the mount. Shells, driftwood, or a small fishnet with seashells can complement the surfboard and tie the room’s theme together. This creates a cohesive, coastal-inspired space.
Maintenance and Care for Your Wall Mount
Regularly check the mount for signs of wear or rust. Tighten any loose screws and replace damaged parts as needed. This is especially important in humid climates where corrosion can occur quickly.
Clean your surfboard before placing it on the mount to prevent dirt and salt from transferring to the wall. Use a damp cloth to wipe down the board and mount periodically. This keeps everything looking fresh and prevents buildup.
If you notice the board shifting or the mount sagging, re-evaluate the installation. Add more screws or adjust the brackets to ensure everything remains secure.
Conclusion
Installing a surfboard wall mount is a simple yet effective way to store your board safely and stylishly. By following the steps outlined above, you can create a functional and visually appealing display that protects your investment. Whether you choose a vertical or horizontal setup, the key is to use the right tools, materials, and techniques for your space.
Take action today and transform your surfboard storage. Your board will thank you, and your home will look better than ever.
FAQ
How much weight can a typical surfboard wall mount hold?
Most quality mounts hold between 20 to 50 pounds, but always check the manufacturer’s specifications.
Can I install a wall mount on a plaster wall?
Yes, but use masonry anchors and a drill bit designed for plaster to ensure a secure hold.
Do I need a professional to install a surfboard wall mount?
No, this is a DIY-friendly project that most people can complete in under an hour with basic tools.
How do I prevent my surfboard from slipping off the mount?
Use mounts with deep grooves or add a bungee cord for extra security.
Are there wall mounts designed for multiple surfboards?
Yes, many mounts are adjustable and can hold multiple boards in a stacked or side-by-side arrangement.

