
Surfing is more than just a sport; it is a way of life for millions of people around the world. With over 23 million surfers globally, the need for proper surfboard storage at home has never been greater. A well-built surfboard stand for home keeps your board safe, organized, and ready for your next adventure. Building your own stand is a rewarding project that saves money and adds a personal touch to your space. This guide will walk you through the process of creating a simple yet sturdy surfboard stand using basic tools and materials.
Whether you are a beginner or a seasoned surfer, this project is easy to tackle in a weekend. You will learn how to choose the right materials, measure and cut with precision, and assemble a stand that fits your board perfectly. Additionally, we will cover unique tips, such as incorporating eco-friendly materials and customizing the design to match your home decor. By the end, you will have a functional and stylish stand that protects your surfboard and enhances your living space.
Why You Need a Surfboard Stand at Home
Storing your surfboard properly extends its lifespan and maintains its performance. A dedicated stand prevents dings, scratches, and warping that can occur when a board is leaned against a wall or left on the floor. This is especially important in humid climates, where moisture can damage the board over time. For example, in coastal areas like Florida or California, the salt air can corrode the fins and weaken the fiberglass if the board is not stored correctly.
A surfboard stand also keeps your space tidy and free from clutter. Instead of tripping over your board or struggling to find a safe spot, you can display it as a piece of art. Many surfers take pride in their boards and enjoy showing them off. A well-designed stand turns your surfboard into a focal point in your home, blending functionality with aesthetics.
Another benefit is the ease of access. When your board is stored on a stand, it is always ready to grab and go. This encourages you to surf more often, as there is no hassle involved in preparing your gear. Plus, a stand can be a conversation starter for guests who share your passion for the ocean.
Materials and Tools You Will Need
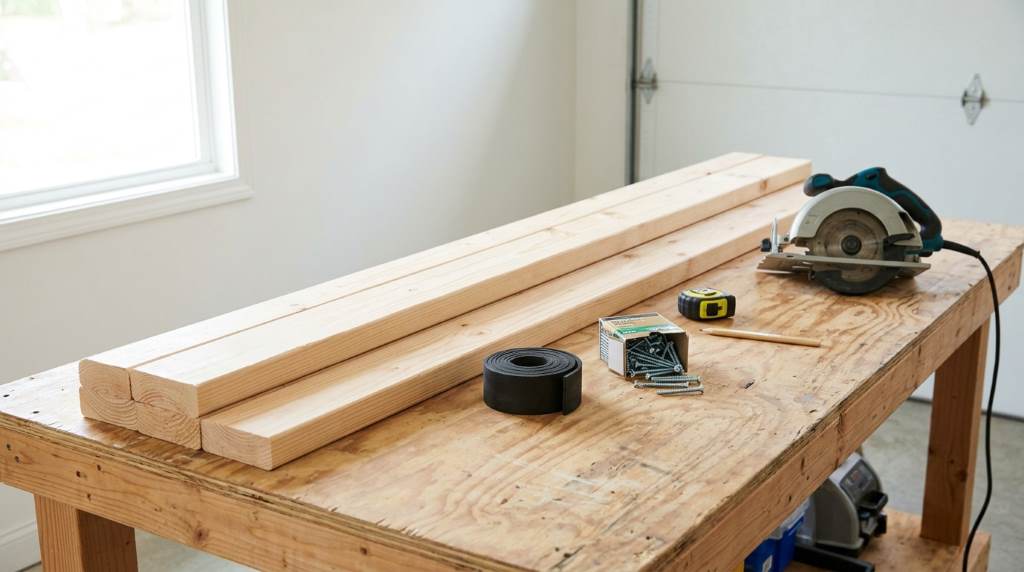
Before you start building, gather all the necessary materials and tools. For a basic wooden stand, you will need two main pieces of wood for the base and one for the support arms. Cedar, pine, or redwood are excellent choices because they are durable and resist rot. You will also need screws, wood glue, and a finish like varnish or paint to protect the wood from the elements.
For tools, a saw, drill, measuring tape, and sandpaper are essential. A level ensures your stand is even, while clamps help hold the pieces together during assembly. If you want to add a personal touch, consider staining or painting the wood to match your home decor. For a more advanced design, you might also need a jigsaw for curved cuts or a router for decorative edges.
If you prefer a metal stand, you will need aluminum or steel pipes, along with connectors and a welding machine or strong adhesive. Metal stands are sleek and modern but require more advanced tools and skills. For this guide, we will focus on a wooden stand, as it is easier for beginners and can be customized in many ways.
Step-by-Step Guide to Building Your Surfboard Stand
Step 1: Measure Your Surfboard
Start by measuring the length, width, and thickness of your surfboard. Most stands are designed to fit the board’s width, so the support arms should be spaced to cradle the board securely. For a standard shortboard, which is about 5 to 7 feet long and 18 to 22 inches wide, the base should be at least 24 inches wide to provide stability. If you have a longboard, adjust the dimensions accordingly.
Write down the measurements and sketch a simple design for your stand. This does not need to be a professional blueprint, but it should include the height of the stand, the width of the base, and the angle of the support arms. A height of 3 to 4 feet is ideal for easy access, while the support arms should angle upward at about 45 degrees to hold the board securely.
Step 2: Cut the Wood
Using your measurements, cut the wood for the base and support arms. For the base, cut two pieces of wood to the desired width, typically 24 to 30 inches. For the support arms, cut two pieces at an angle to create a V-shape that will cradle the board. The length of the support arms will depend on the height of your stand and the angle you choose.
If you are not comfortable using a saw, many hardware stores offer cutting services for a small fee. This is a great option if you do not have the tools at home. Once the pieces are cut, sand the edges to remove any splinters and create a smooth finish. This step is important for both safety and aesthetics.
Step 3: Assemble the Base
Lay the two base pieces parallel to each other on a flat surface. Use wood glue and screws to attach two crosspieces at each end, creating a rectangular frame. The crosspieces should be cut to the same length as the width of your base. For added stability, you can also add a center support beam, especially if your stand will hold multiple boards.
Use clamps to hold the pieces together while the glue dries, and ensure the frame is square by measuring the diagonals. They should be equal in length. Once the base is assembled, sand any rough spots and check for stability. The base should sit flat on the ground without wobbling.
Step 4: Attach the Support Arms
Position the support arms at the top of the base, angling them inward to create a V-shape. The arms should be spaced to fit the width of your surfboard. For a standard shortboard, a spacing of 18 to 20 inches works well. Use screws and wood glue to attach the arms to the base, reinforcing the joints with additional screws if needed.
To ensure the arms are level and symmetrical, use a level and measuring tape to check their alignment. The arms should be at the same height and angle to prevent the board from sliding off. Once the arms are securely attached, sand the entire stand to create a smooth, professional finish.
Step 5: Add Finishing Touches
Apply a finish to the wood to protect it from moisture and wear. Varnish, paint, or stain are all good options, depending on the look you want. If you are storing your board indoors, a clear varnish will highlight the natural grain of the wood. For outdoor use, choose a finish that is weather-resistant to prevent damage from the elements.
You can also add felt pads to the support arms to prevent scratches on your surfboard. These are inexpensive and easy to apply with adhesive. For a more personalized touch, consider adding a logo, carving, or other decorative elements to the stand. This is a great way to make it uniquely yours.
Unique and Uncommon Tips for Your Surfboard Stand
Most guides focus on the basics, but there are several unique tips that can take your surfboard stand to the next level. One idea is to use reclaimed wood or driftwood for a rustic, eco-friendly look. This not only adds character to your stand but also reduces waste. You can find reclaimed wood at salvage yards, construction sites, or even on the beach.
Another uncommon tip is to incorporate a storage shelf into the base of the stand. This is perfect for storing wax, leashes, or other surfing accessories. To do this, add a flat piece of wood between the crosspieces of the base, creating a small shelf. You can also include hooks on the sides of the stand to hang wetsuits or towels.
For surfers who travel frequently, a collapsible stand is a practical solution. Use hinges to connect the support arms to the base, allowing you to fold the stand flat for easy transport. This is especially useful if you have limited space at home or like to take your board on road trips. When not in use, the stand can be stored in a closet or under a bed.
If you want to showcase multiple boards, consider building a multi-tiered stand. This involves stacking two or more stands on top of each other, with each tier designed to hold a board. This is a great way to display a collection of surfboards while saving floor space. Just ensure each tier is sturdy enough to support the weight of the boards above it.
Customizing Your Stand for Different Climates
If you live in a humid or coastal climate, moisture resistance is key. Choose materials like cedar or redwood, which naturally resist rot and insects. You can also treat the wood with a waterproof sealant to provide extra protection. For added durability, consider using stainless steel screws, which will not rust in salty air.
In dry climates, the main concern is UV damage from the sun. If your stand will be placed near a window or outdoors, use a UV-resistant finish to prevent the wood from fading or cracking. You can also add a canopy or cover to shield the stand and board from direct sunlight. This will help maintain the integrity of both the stand and your surfboard.
For surfers in cold climates, storing your board indoors is a must. A stand placed in a garage or basement should be elevated off the floor to avoid contact with cold concrete, which can damage the board. You can also add wheels to the base of the stand for easy movement, allowing you to roll it out of the way when not in use.
Common Mistakes to Avoid
One of the most common mistakes is using the wrong measurements. If the support arms are too far apart, the board will not sit securely. If they are too close, the board may not fit at all. Always double-check your measurements before cutting the wood, and test the fit with your board before finalizing the assembly.
Another mistake is using weak or low-quality materials. Thin wood or flimsy screws can cause the stand to wobble or collapse, potentially damaging your board. Invest in sturdy materials and reinforce the joints with both glue and screws. This will ensure your stand lasts for years to come.
Avoid skipping the sanding step, as rough edges can scratch your board or pose a safety hazard. Take the time to sand all surfaces thoroughly, paying special attention to the support arms where the board will rest. A smooth finish not only looks better but also protects your surfboard.
Finally, do not forget to consider the weight of your board. Longboards and heavy shortboards require a sturdier stand than lightweight foam boards. If you are unsure about the weight capacity of your stand, err on the side of caution and use thicker wood or additional support beams.
Maintenance Tips for Your Surfboard Stand
To keep your stand in top condition, inspect it regularly for signs of wear or damage. Check the screws and joints to ensure they are tight and secure. If you notice any wobbling or instability, reinforce the stand with additional screws or glue. This is especially important if the stand is exposed to moisture or frequent use.
Clean the stand periodically with a damp cloth to remove dust, salt, or sand. Avoid using harsh chemicals, as they can damage the finish or the wood. For wooden stands, reapply the finish every few years to maintain protection against the elements. This will keep your stand looking new and prevent it from deteriorating over time.
If your stand is stored outdoors, bring it inside during extreme weather conditions, such as heavy rain or snow. Prolonged exposure to the elements can weaken the materials and shorten the lifespan of the stand. For added protection, use a waterproof cover to shield the stand and your board from moisture and UV rays.
Creative Display Ideas for Your Surfboard Stand
Your surfboard stand does not have to be purely functional; it can also be a statement piece in your home. Place it in a prominent location, such as your living room or entryway, to showcase your passion for surfing. You can also pair it with other beach-themed decor, like seashells, driftwood, or nautical ropes, to create a cohesive look.
For a minimalist vibe, opt for a sleek, modern design with clean lines and a neutral color palette. This works well in contemporary homes and allows the surfboard to be the star of the show. If you prefer a more rustic aesthetic, use natural wood finishes and add decorative elements like carved waves or fish motifs.
Another creative idea is to incorporate lighting into your stand. Add LED strip lights under the base or along the support arms to highlight your board at night. This creates a stunning visual effect and draws attention to your stand. You can also use solar-powered lights for an eco-friendly touch.
If you have multiple boards, arrange them in a staggered or asymmetrical pattern on the stand. This adds visual interest and allows you to display boards of different sizes and colors. For a truly unique look, mix and match stands of varying heights and designs to create a dynamic display.
Conclusion
Building a simple surfboard stand for home is a rewarding project that combines functionality with creativity. By following the steps outlined in this guide, you can create a stand that protects your board, enhances your space, and reflects your personal style. Whether you choose a basic wooden design or a more elaborate custom stand, the key is to use quality materials and pay attention to detail.
Remember, the best stand is one that meets your specific needs and fits seamlessly into your home. Do not be afraid to experiment with different materials, designs, and finishes to make it your own. With a little effort and imagination, you can build a stand that is as unique as your surfing journey.
Now that you have the knowledge and inspiration, it is time to grab your tools and start building. Your surfboard will thank you, and your home will look better than ever. Happy building, and here is to many more waves and adventures!
FAQ
What is the best wood for a surfboard stand?
Cedar, pine, and redwood are excellent choices because they are durable and resist rot.
How tall should a surfboard stand be?
A height of 3 to 4 feet is ideal for easy access and stability.
Can I build a stand for multiple surfboards?
Yes, you can create a multi-tiered stand or use a wider base to hold multiple boards.
Do I need special tools to build a surfboard stand?
A saw, drill, measuring tape, and sandpaper are the basic tools required for a wooden stand.
How do I protect my stand from moisture?
Use a waterproof sealant or varnish and choose naturally rot-resistant woods like cedar.

