
Thread a short leash string through the leash plug near the board tail. Next, loop the leash rail saver through that string and pull it snug. Then fasten the padded cuff around your back ankle with the cord facing outward. Lastly, test every connection with a firm tug before you paddle out.
A secure leash keeps your board close after every wipeout. Also, it protects other surfers from a loose board in crowded lineups. Meanwhile, a sloppy attachment risks rail damage, tangles, and sudden failure. Therefore, spend two minutes on setup and surf with full confidence.
Gather Your Leash Parts
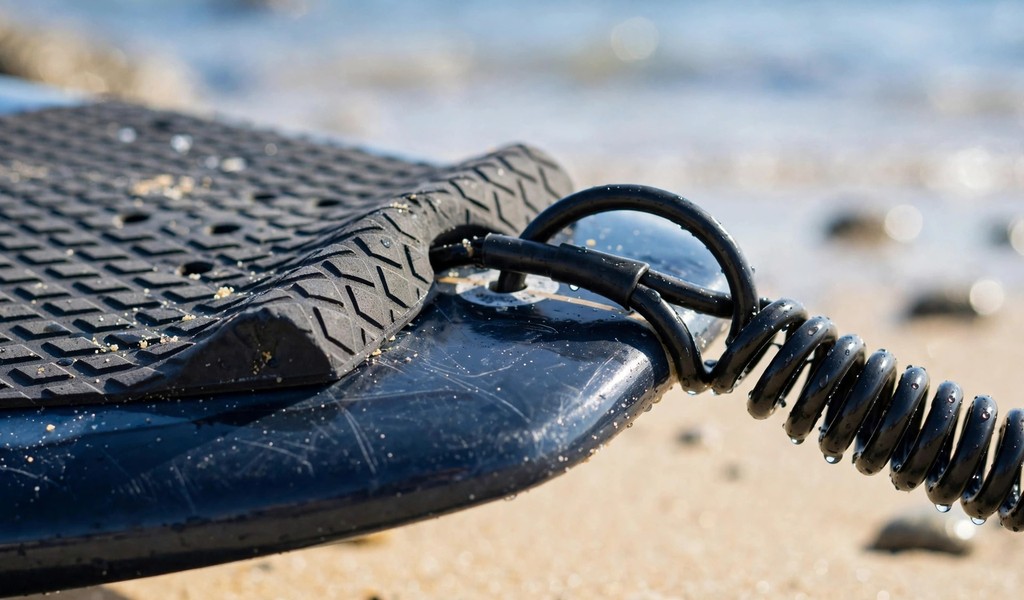
Start with a complete leash kit before you touch the board. First, identify the urethane cord, padded ankle cuff, rail saver, and swivels. Second, confirm the leash string matches the plug size on your tail. Third, check the Velcro closure for sand, wear, or weak grip.
- Cord: Choose a straight cord for shortboards and a coiled cord for longboards.
- Cuff: Pick a padded ankle cuff for shortboards and a calf cuff for longboards.
- Length: Match the leash length to your board length for balanced drag and recoil.
- Thickness: Use a 6mm cord for small waves and a 7mm cord for powerful surf.
Thread the Leash String Through the Plug
Lay the board upside down on a soft surface first. Afterward, locate the small leash plug near the tail center. After that, push one end of the string through the plug bar. To finish, pull both ends even and tie a secure knot.
Keep the finished loop short and snug against the tail. Otherwise, a long loop can saw into the rail during hard wipeouts. Besides that, trim excess string only after you test the fit. At the same time, replace frayed string immediately instead of trusting worn material.
- Fin key: Use a fin key to push stiff string through a tight plug.
- Knot check: Tug the knot hard twice before you attach the rail saver.
Connect the Rail Saver and Swivel
Open the rail saver flap and feed its strap through the string loop. Next, fold the strap back and press the Velcro closed firmly. After that, confirm the wide padded section covers the tail edge fully. For good measure, spin each swivel with your fingers and confirm smooth rotation.
Double swivels stop the cord from twisting into tangles during turns. Furthermore, a clean swivel lets the board trail naturally behind you. However, sand and salt can stiffen swivels over time. Therefore, rinse the hardware with fresh water after every session.
Fasten the Cuff on the Correct Foot
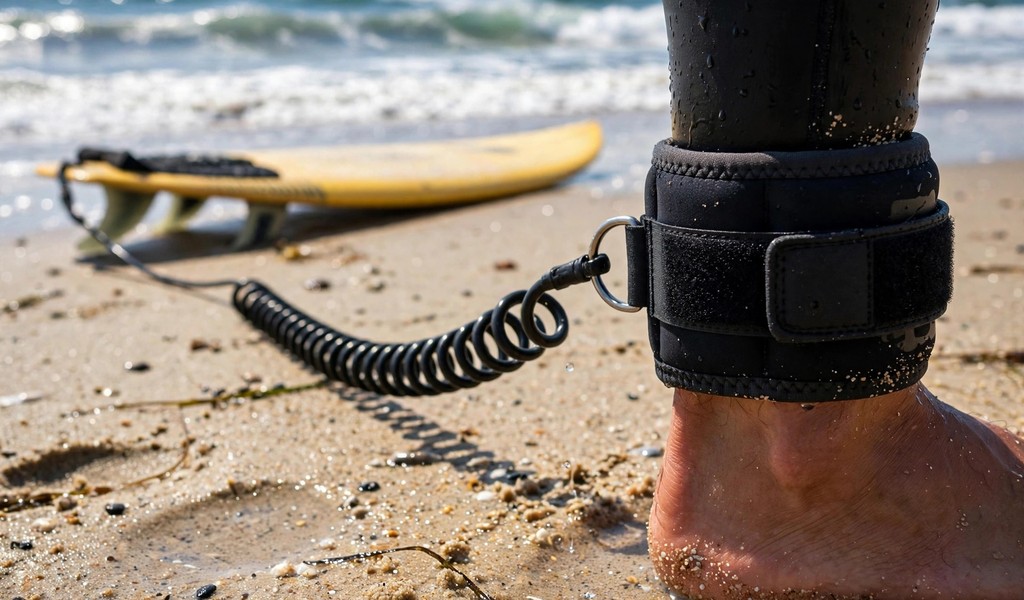
Wear the cuff on your back foot for reliable control. Regular foot surfers place the cuff on the right ankle. Goofy foot surfers place the cuff on the left ankle. Equally important, position the cord attachment on the outer side of your ankle.
Wrap the neoprene cuff snugly without cutting off circulation. Afterward, press the Velcro strap flat and smooth out any wrinkles. Soon after, walk a few steps and confirm the cuff stays put. Lastly, slide one finger under the strap to check comfortable tension.
Check Your Setup Before Entering the Water
Give the cord a sharp pull away from the board first. Then, inspect the string, rail saver, swivels, and Velcro once more. Along the way, untangle any twists so the cord trails cleanly behind you. Next, practice a quick release so you can free yourself fast.
Never wrap the cord around your hand or fingers at any time. Otherwise, a sudden pull can cause serious finger injuries in seconds. At the same time, never surf crowded lineups with a damaged or stretched leash. Instead, replace suspect gear before it fails in heavy surf. Choosing the right leash also matters for safety and performance. See how to select the perfect surfboard leash for guidance before you buy.
Maintain Your Leash for a Longer Life
Rinse the whole leash with fresh water after each surf. Afterward, hang it loosely in shade instead of coiling it tightly. On top of that, inspect the cord monthly for cracks, kinks, or stiff sections. In the end, replace the leash every six to twelve months with regular use.
Sun and salt weaken urethane faster than most surfers expect. Moreover, stretched cords lose recoil and snap without warning. Therefore, retire any leash that shows cuts, fading, or weak Velcro. Ultimately, fresh gear costs far less than a lost board.
Frequently Asked Questions
How long should a surf leash be?
Match the leash length to your board length for balanced drag and easy recovery.
Which ankle wears the surf leash?
Wear the cuff on your back foot, right for regular surfers and left for goofy surfers.
How often should you replace a surf leash?
Replace your leash every six to twelve months, or sooner when wear appears.
Can you use a coiled leash for shortboarding?
Choose a straight leash for shortboards, since coiled cords drag and slow quick turns.
What should you check before every surf session?
Check the string, rail saver, swivels, Velcro, and cord for damage before every session.
Conclusion
A careful attachment takes minutes and protects every session afterward. Also, good habits keep your board close and fellow surfers safe. As a result, check your leash today, replace worn parts promptly, and paddle out with confidence.
Grab your leash now and run through each step above. After that, head to the beach and enjoy safer, tangle-free surf sessions.

