
Every surfer knows the sinking feeling of seeing a fresh ding or crack on their beloved board. Whether it’s from a rough wipeout, a collision with a rock, or just wear and tear, damage happens. The good news is that most minor surfboard repairs can be done at home with the right tools and a little know-how. Fixing your board yourself saves money and extends its life, so you can get back in the water faster.
I remember the first time I dinged my surfboard. I was devastated, thinking it was the end of my board’s life. Then a friend introduced me to a surfboard repair kit. With a bit of patience and guidance, I patched it up, and my board was as good as new. That experience taught me that repairing a surfboard at home is easier than it seems.
Why Repair Your Surfboard at Home?
Taking your surfboard to a professional for repairs can be expensive and time-consuming. According to a survey by Surfer Magazine, the average cost of a professional ding repair ranges from $50 to $200, depending on the size and severity of the damage. For many surfers, especially beginners or those on a budget, this cost adds up quickly. A surfboard repair kit allows you to fix minor damage yourself for a fraction of the price.
Additionally, repairing your board at home gives you the satisfaction of maintaining your own gear. You’ll learn more about your surfboard’s construction and how to care for it properly. This knowledge can help you prevent future damage and keep your board in top condition for longer.
Another advantage is convenience. Instead of waiting days or weeks for a repair shop to fix your board, you can often complete the repair in a few hours. This means less downtime and more time in the water. With the right tools and techniques, you can tackle everything from small dings to larger cracks with confidence.
Understanding Your Surfboard’s Construction
Before you start any repair, it’s important to understand what your surfboard is made of. Most modern surfboards are constructed with a foam core, typically made of polyurethane or expanded polystyrene (EPS), and a fiberglass outer layer. The type of foam and resin used can affect how you approach the repair.
Polyurethane foam is the traditional material and is often paired with polyester resin. EPS foam, on the other hand, is lighter and usually paired with epoxy resin. Knowing which type of foam and resin your board uses will help you choose the right repair materials. For example, polyester resin is not compatible with EPS foam, so you’ll need epoxy resin for those repairs.
If you’re unsure about your board’s construction, check the manufacturer’s website or ask at your local surf shop. Most repair kits come with instructions for different types of boards, so you can find the right approach for your specific surfboard. Understanding these basics ensures your repair will be strong and long-lasting.
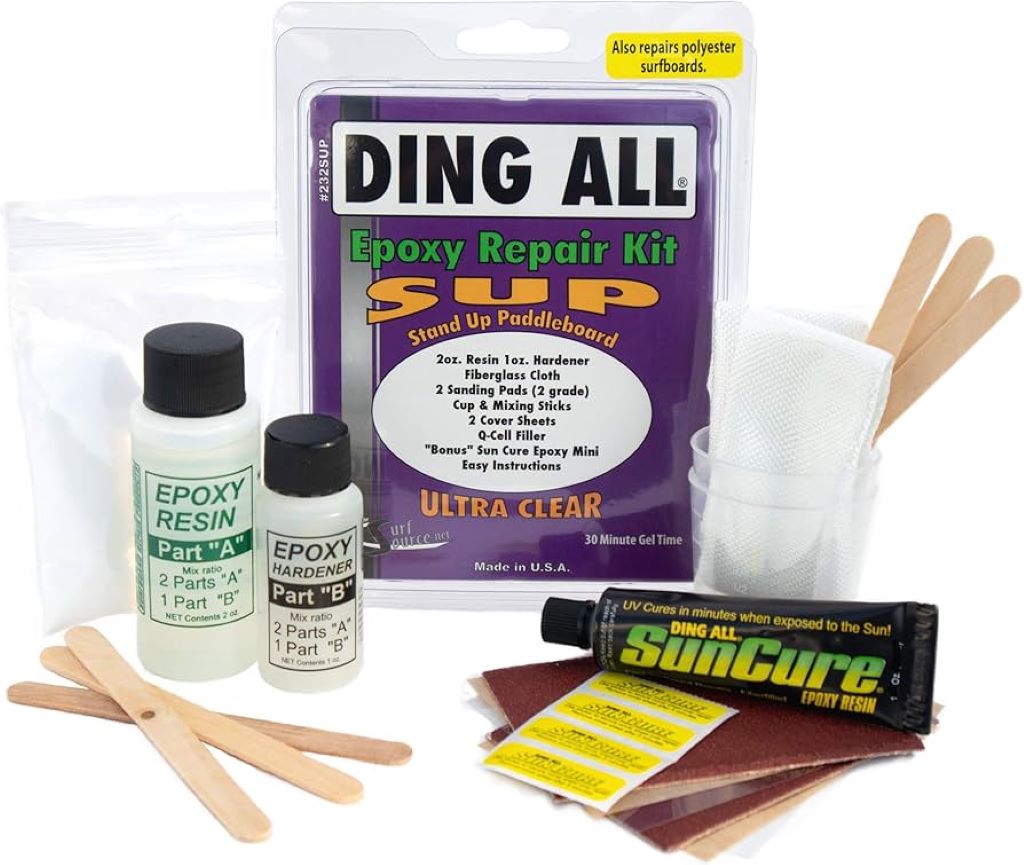
Essential Tools and Materials for DIY Surfboard Repair
A basic surfboard repair kit is all you need to fix most minor damage at home. These kits typically include fiberglass cloth, resin, a mixing cup, a stir stick, and sandpaper. Some kits also come with a squeegee or spreader for applying the resin smoothly. If you don’t have a kit, you can purchase these items separately at a surf shop or online.
In addition to the kit, you’ll need a few extra tools to make the job easier. A utility knife or razor blade is useful for trimming excess fiberglass and cleaning up the repair area. You’ll also need masking tape to protect the surrounding area from resin drips. A heat gun or hairdryer can help speed up the curing process for the resin.
Safety is also important. Always work in a well-ventilated area, as resin fumes can be harmful. Wear gloves to protect your hands from the resin and fiberglass, and use a respirator mask if you’re sensitive to fumes. Having all your tools and materials ready before you start ensures a smooth and efficient repair process.
Step-by-Step Guide to Repairing a Ding or Small Crack
Repairing a small ding or crack is the most common surfboard repair you’ll encounter. Start by cleaning the damaged area with acetone or rubbing alcohol to remove any wax, dirt, or salt. This ensures the resin will adhere properly. Use a utility knife to trim any loose or frayed fiberglass around the edges of the damage.
Next, cut a piece of fiberglass cloth slightly larger than the damaged area. If the damage is deep, you may need to fill it with a small amount of foam or a specialized filler before applying the fiberglass. Mix the resin according to the manufacturer’s instructions, usually in a 1:1 or 2:1 ratio of resin to hardener.
Apply a thin layer of resin to the damaged area, then place the fiberglass cloth over it. Use a squeegee or spreader to press the cloth into the resin, ensuring there are no air bubbles. Apply another layer of resin over the cloth, making sure it’s fully saturated. Allow the repair to cure for the recommended time, usually 24 hours, before sanding it smooth.
Fixing Larger Cracks or Delamination
Larger cracks or delamination, where the fiberglass separates from the foam, require a bit more work. Start by cleaning the area thoroughly and removing any loose material. If the crack is deep, you may need to inject foam or filler to level the surface before applying fiberglass.
For delamination, use a utility knife to carefully lift the separated fiberglass and clean underneath it. Apply a thin layer of resin to the foam and the underside of the fiberglass, then press the fiberglass back into place. Use a weight or clamp to hold it down while the resin cures.
For larger cracks, you may need to apply multiple layers of fiberglass cloth. Start with a small piece to cover the crack, then build up with larger pieces to reinforce the area. Sand each layer lightly before applying the next to ensure a strong bond. Once the final layer is cured, sand the entire repair smooth and blend it with the surrounding area.
Sanding and Finishing Your Repair
Sanding is a crucial step in achieving a smooth, professional-looking repair. Start with coarse-grit sandpaper, around 80 to 120 grit, to remove any excess resin or fiberglass. Be careful not to sand too aggressively, as this can damage the surrounding area. Gradually move to finer grits, such as 220 or 400, to smooth out the repair.
Wet sanding is a great technique for achieving a flawless finish. Use a sanding block and water to sand the repair in circular motions. This helps to blend the repair with the rest of the board and removes any scratches. After sanding, wipe the area clean with a damp cloth to remove any dust.
Finally, apply a coat of wax or polish to the repaired area to restore the board’s shine and protect the repair. If your board has a colored or custom finish, you may need to touch up the paint or use a tinted resin to match the original look. With a little practice, your repairs will be nearly invisible.
Common Mistakes to Avoid
One of the most common mistakes in DIY surfboard repair is not cleaning the damaged area thoroughly. Wax, dirt, or salt can prevent the resin from adhering properly, leading to a weak repair that may fail. Always take the time to clean the area with acetone or rubbing alcohol before starting.
Another mistake is using too much resin. While it might seem like more resin would make a stronger repair, it can actually create a heavy, uneven surface that’s difficult to sand. Follow the manufacturer’s instructions for mixing ratios, and apply the resin in thin, even layers.
Rushing the curing process is also a common issue. Resin needs time to cure properly, and using a heat gun or hairdryer can cause it to bubble or crack. Allow the repair to cure for the full recommended time before sanding or using the board. Patience is key to a strong, long-lasting repair.
Personal Story: My First Surfboard Repair
My first attempt at repairing a surfboard was a learning experience. I had a small ding near the nose of my board, and I was determined to fix it myself. I bought a repair kit and watched a few tutorials online, feeling confident I could handle it. However, I quickly realized that I had underestimated the importance of preparation.
I skipped cleaning the area thoroughly, and the resin didn’t adhere properly. The repair lasted only a few sessions before it started to peel. Frustrated, I sanded it down and tried again, this time taking my time to clean the area and apply the resin correctly. The second attempt was a success, and the repair held up for the rest of the season.
That experience taught me the value of patience and attention to detail. Since then, I’ve repaired countless dings and cracks on my boards, and each time, I learn something new. If you’re new to surfboard repair, don’t be discouraged by mistakes. They’re part of the learning process, and each one makes you a better surfer and craftsman.
FAQs
What is the best surfboard repair kit for beginners?
A basic repair kit with fiberglass cloth, resin, and sandpaper is a great starting point. Look for kits that include detailed instructions and are designed for your board’s construction, whether it’s polyurethane or EPS foam.
How long does it take for a surfboard repair to cure?
Most resins cure within 24 hours, but it’s best to wait at least 48 hours before sanding or using the board. Always follow the manufacturer’s instructions for the specific resin you’re using.
Can I repair a surfboard with a large crack at home?
Yes, but larger cracks may require multiple layers of fiberglass and filler. If the damage is extensive or affects the board’s structural integrity, it’s best to consult a professional.
How do I match the color of my surfboard when repairing?
You can use tinted resin or paint to match your board’s color. Some repair kits come with color-matching options, or you can mix pigments into the resin to achieve the desired shade.
What should I do if my repair starts to peel?
If your repair starts to peel, sand the area down and clean it thoroughly before reapplying the resin and fiberglass. Make sure the surface is completely clean and dry for a strong bond.
Conclusion
Repairing your surfboard at home is a rewarding and cost-effective way to keep your board in top condition. With a simple repair kit and a little practice, you can fix most minor damage and extend the life of your board. Understanding your board’s construction, using the right materials, and following the proper techniques are key to a successful repair.
Don’t be afraid to tackle repairs yourself. Start with small dings and work your way up to larger cracks as you gain confidence. With each repair, you’ll become more skilled and self-sufficient, and you’ll save money in the long run.
Now, it’s your turn. Have you ever repaired a surfboard at home? Share your tips, tricks, or stories in the comments below—we’d love to hear from you!

