
Imagine you paddle into a perfect wave, pop up smoothly, and carve a flawless path across its face. You feel the rush as you accelerate through sections, avoiding closeouts, and ride it all the way to the shore. This thrill comes from setting a proper line on the wave. Surfers who master this skill enjoy longer rides, more maneuvers, and fewer wipeouts. In this guide, you learn step-by-step how to choose and maintain the best trajectory. Whether you start as a beginner or refine intermediate skills, these insights help you progress. Based on widely accepted industry standards, you gain practical advice to apply on your next session.
Understanding the Basics of Wave Lines
You start by grasping what a wave line means in surfing. This foundation sets you up for success on every ride.
What is a Wave Line?
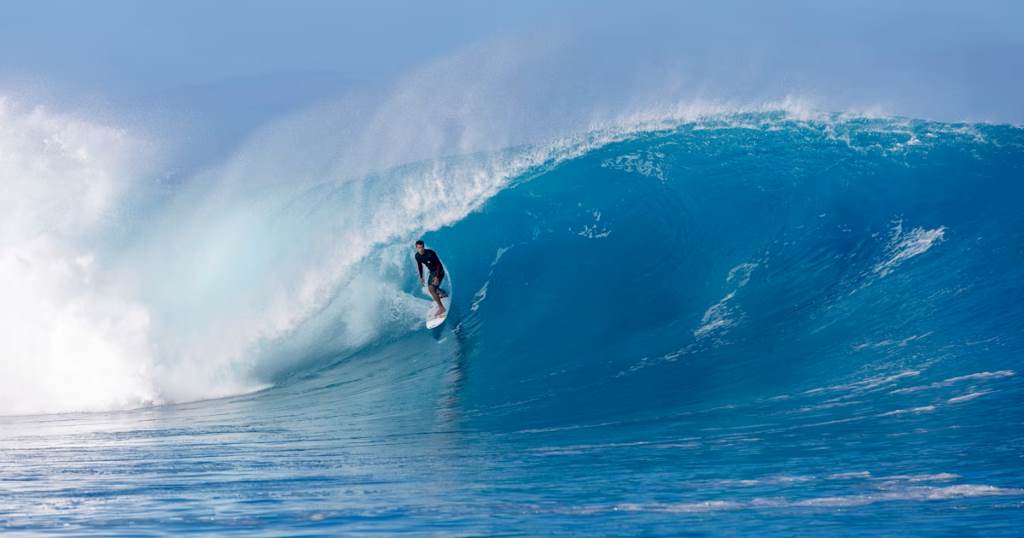
A wave line refers to the path you take across the wave’s face. You choose this trajectory to maximize speed, control, and time on the wave. Think of it as drawing an invisible route from the takeoff point to the end of the ride. According to industry experts, a good line follows the wave’s natural peel, staying in the steepest, most powerful section.
You avoid flat areas that slow you down or steep lips that throw you off. Instead, you aim for the pocket, where the wave curls and provides energy. Professionals emphasize that lines vary by wave type, from crumbly beach breaks to hollow reefs. You adapt your choice to match the conditions.
Why Setting a Proper Line Matters
You ride longer and perform better maneuvers with a solid line. Poor choices lead to quick fades or wipeouts. As recommended by professionals, a proper line builds confidence and reduces frustration in crowded lineups.
You also respect other surfers by holding your line without snaking or dropping in. This skill separates novices from skilled riders. Industry standards highlight that mastering lines improves overall wave count and enjoyment.
Reading the Wave Before You Paddle
You assess the wave long before catching it. This step ensures you position correctly and select the right one.
Identifying the Peak
You spot the peak, the highest point where the wave first breaks. Sit slightly outside the impact zone to observe sets rolling in. Look for the A-frame shape, where water mounds up before spilling left or right.
According to widely accepted industry standards, you align with the peak for priority. Move deeper if waves close out, or wider if they section. You use landmarks like rocks or buildings to triangulate your spot.
Determining Wave Direction and Speed
You decide if the wave breaks left or right from your perspective. A right-hander peels to your right as you face the shore. Match your stance—regular or goofy—to the direction for easier turns.
Gauge the wave’s speed by watching how quickly it unravels. Slow, mushy waves require aggressive pumping, while fast barrels demand quick adjustments. Professionals recommend scanning the horizon for incoming swells to predict behavior.
You factor in wind and tide. Onshore winds chop up faces, making lines harder to hold. Low tides expose reefs, altering paths. Practice this observation from the beach first to sharpen your eye.
Positioning in the Lineup
You secure your place among other surfers to catch waves effectively. Proper positioning avoids conflicts and maximizes opportunities.
Finding Your Spot in the Crowd
You paddle to the shoulder, away from the main peak if you’re new. As you gain experience, edge closer to the takeoff zone. Sit where waves consistently form, using the “Christmas tree” whitewater pattern as a guide—align with its top.
Based on manufacturer guidelines for board choice, shorter boards suit tighter lines in steep waves. You adjust based on your fitness; stronger paddlers claim deeper positions.
Lineup Etiquette for Safe Surfing
You follow unwritten rules to maintain harmony. The surfer closest to the peak has priority. Paddle wide around riders to avoid interfering.
If you miss a wave, return to the back of the rotation. According to industry experts, communicating with shouts like “going left” prevents collisions. Respect locals and share waves fairly.
You watch for snakes—surfers who paddle around you unfairly. Stay alert but calm. Good etiquette earns you more waves over time.
The Takeoff: Setting Your Initial Line
You establish your line during the takeoff. This moment dictates the rest of your ride.
Angling Your Paddle and Entry
You paddle at an angle, not straight down the face. Aim 30-45 degrees toward your intended direction. As the wave lifts you, take three strong strokes while looking where you want to go.
Weight your inside rail to dig in and set the line. This sinks the board into the wave, preventing slides. Professionals advise keeping your chest low for better momentum.
Perfecting the Pop-Up for Control
You pop up quickly once the board planes. Place your hands flat beside your chest, push up, and bring feet under you in one motion. Stance wide, knees bent, arms out for balance.
Look down the line, not at your feet. According to widely accepted industry standards, a centered stance maintains speed. Adjust weight forward for acceleration or back to slow down.
Practice on land with a balance board. This builds muscle memory for seamless transitions in water.
Maintaining and Adjusting Your Line
You refine your path as the wave evolves. Active adjustments keep you in the power zone.
Controlling Speed Along the Face
You pump to generate speed in slow sections. Bend knees, shift weight from heel to toe, and compress like a spring. Release to propel forward.
Trim by leaning slightly forward in fast parts. Use your rails—inside for drive, outside for turns. Industry experts note that proper speed management extends rides significantly.
Using Bottom and Top Turns
You execute a bottom turn to redirect up the face. Drop low, lean into the rail, and look toward the lip. This sets up for maneuvers.
Follow with a top turn off the lip for radical style. Snap quickly or carve smoothly based on wave power. Professionals recommend linking these for fluid lines.
Adapt to sections: Fade around closeouts or accelerate through flats. Read the wave’s contours to anticipate changes.
Common Mistakes When Setting a Line
You avoid pitfalls that derail rides. Recognize these errors early.
- Dropping Straight Down: You lose speed quickly. Angle instead to stay in the pocket.
- Poor Positioning: Sitting too deep causes late takeoffs. Move shallower for better entry.
- Looking at Feet: This throws balance. Gaze down the line always.
- Grabbing Rails: Hands disrupt flow. Keep them free for adjustments.
- Ignoring Wave Speed: Mismatching leads to bogging. Pump or trim accordingly.
- Snaking Others: This invites conflict. Wait your turn patiently.
According to industry experts, fixing these boosts progress rapidly. Video your sessions to spot issues.
Advanced Techniques for Mastering Wave Lines
You elevate your surfing with pro-level strategies. These build on basics for dynamic rides.
Pumping for Maximum Speed
You use the wave’s face like a pump track. In the trough, compress and extend to gain velocity. Target high-to-low transitions for boosts.
Link pumps with turns for seamless flow. Based on manufacturer guidelines, responsive boards enhance this technique.
Carving Powerful Turns
You carve by engaging full rails. For frontside, drive through heels; backside, toes. Keep speed through the arc.
Visualize S-shapes down the line. Professionals stress compressing low for tighter radii.
Reading Complex Wave Sections
You anticipate reforms or bowls. Slow for hollow parts, accelerate for mush. In barrels, set high lines to exit cleanly.
Study wave forecasts to prepare. According to widely accepted industry standards, experience hones this intuition.
Practice in varying conditions. Start small, build to bigger waves.
Training Drills to Improve Your Lines
You hone skills with targeted exercises. These accelerate improvement.
On-Land Simulations
You shadow surf on a skateboard. Carve turns on pavement to mimic wave paths. Use cones for slalom practice.
Balance on indo boards while visualizing lines. This strengthens core and stance.
In-Water Practice Routines
You catch whitewater first. Angle takeoffs and trim straight. Progress to green waves.
Count pumps per ride to track speed gains. Film sessions for analysis.
Join group lessons for feedback. According to professionals, consistent practice yields results in weeks.
Mental Visualization Techniques
You picture perfect lines before paddling out. Close eyes, see the wave, feel the board.
Review pro footage mentally. This builds confidence for real sessions.
Gear Considerations for Better Lines
You select equipment that supports your style. Proper gear enhances control.
Choosing the Right Surfboard
You pick boards with rocker for steep waves, flat for small. Shorter for quick turns, longer for speed.
Based on manufacturer guidelines, volume affects paddling ease. Test different shapes.
Fin Setups for Control
You experiment with thrusters for stability, quads for speed. Larger fins grip better in big waves.
Industry experts recommend adjustable systems to fine-tune.
Leashes and Wax for Safety
You use strong leashes to retrieve boards. Wax grips feet for precise weighting.
Maintain gear regularly for reliable performance.
Related:
North Shore Surfing: Epic Waves and Legendary Breaks on Oahu’s Wild Coast
Your Ultimate Guide to the Top 5 Surfing Wetsuits for Every Water Condition
Dealing with Different Wave Types
You adapt lines to conditions. Each break demands unique approaches.
Beach Breaks vs. Point Breaks
Beach breaks shift; you reposition often. Points offer predictable peels for long lines.
Scan constantly in beaches, relax more on points.
Handling Small vs. Large Waves
Small waves need aggressive pumping. Large require conservative lines to avoid wipeouts.
According to professionals, scale maneuvers to size.
Wind and Tide Influences
Offshore winds groom faces for clean lines. High tides soften, low expose hazards.
Time sessions around optimal tides.
Building Confidence in Crowded Lineups
You navigate busy spots effectively. Confidence grows with experience.
Strategies for Wave Selection
You choose waves others miss, like insiders. Prioritize quality over quantity.
Paddle efficiently to claim position.
Communicating with Other Surfers
You signal intentions clearly. Eye contact prevents mishaps.
Build rapport for fair shares.
Overcoming Fear of Wipeouts
You accept falls as learning. Breathe deep, paddle back out.
Visualize success to push limits.
The Role of Fitness in Setting Lines
You rely on strength for execution. Fit surfers hold lines longer.
Core and Balance Training
You plank and yoga for stability. These mimic surfing demands.
Paddling Endurance Workouts
You swim laps or use ergometers. Build shoulders for strong entries.
Flexibility for Maneuvers
You stretch hips and back. Loose muscles enable deep compressions.
According to industry experts, weekly routines transform performance.
Analyzing Pro Surfers’ Lines
You study elites for inspiration. Their paths reveal secrets.
Breaking Down Competition Footage
You watch heats, pause on takeoffs. Note rail engagement.
Learning from Different Styles
You compare carvers like Kelly Slater to aerialists like John Florence. Adapt elements.
Applying Pro Insights to Your Surfing
You mimic one technique per session. Track improvements.
Seasonal and Location-Specific Tips
You adjust for globals variations. Knowledge expands horizons.
Surfing in Tropical vs. Cold Water
Tropics offer consistent swells; layer up in cold for focus.
Popular Spots and Their Unique Lines
You research breaks like Pipeline for high lines, Snapper for drawn-out.
Traveling Surfer’s Adaptation Guide
You observe locals first. Ask politely for tips.
Conclusion
You now hold the tools to set a proper line on any wave. Start with reading swells, position smartly, angle takeoffs, and adjust dynamically. Avoid common errors, practice advanced moves, and train consistently. Surfing rewards patience and persistence. Grab your board, hit the water, and apply these steps today. Your rides improve with every session. Ready to carve your best lines yet? Paddle out and own the wave!
FAQ
What does “setting a line” mean in surfing?
Setting a line means choosing and following the optimal path across a wave’s face. You maximize speed and ride duration this way.
How do I know where to position in the lineup?
Look for the peak where waves break first. Align using landmarks. Sit deeper for priority as skills grow.
Why do I keep losing speed on waves?
You might drop straight down or ignore sections. Angle takeoffs and pump through flats to maintain velocity.
What’s the difference between a left and right wave?
A left breaks to your left facing shore; right to your right. Choose based on your stance for comfort.
How can I avoid dropping in on others?
Observe priority: Closest to peak goes first. Paddle wide and communicate directions.
What board helps with better lines?
Responsive shapes with proper volume suit your level. Thrusters offer control for most.
How do I practice lines without waves?
Use skateboards for carving drills or visualize mentally. Balance boards build stance.
What’s a common beginner mistake in lines?
Looking down disrupts balance. Always gaze ahead down the line.
How does wind affect wave lines?
Onshore chops faces, making holds tough. Offshore grooms for smooth paths.
When should I pump vs. trim?
Pump in slow sections for speed; trim in fast to control.

